Holidays &
Seasons:
Autumn Leaf Candle
Holder
Today's Snack: Have orange sections with a few maraschino cherries and half a banana, or
other fruits with autumn colors such as pears or grapefruit, to celebrate the
beautiful colors of autumn. Drink "paint" for this visual picture that is
actually golden apple cider!
--------------------
Supplies:
This is a two-part project; allow
2-3 weeks in between two sessions
Session 1:
Trip to the park or outside under
autumn trees
Collect an assortment of autumn leaves
Newspaper or waxed paper | Heavy
books
Session 2 (two to three weeks later):
One Mason jar (pint or quart sized
canning jar; Ball or Kerr are good brands)
Mod Podge decoupage medium | Brush
Matte clear acrylic spray sealer
Votive candle or battery-operated
tea light
- Make beautiful candle holders out of autumn leaves that you collect,
and inexpensive glass canning jars. You can make one, or extras to give
away, and you can make several in all different sizes to make a striking
centerpiece, especially as Thanksgiving rolls around. You do this project
in two sessions that are 2-3 weeks apart.
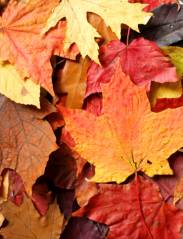
- Session 1: Go on an autumn leaf collecting excursion. Look for
leaves that are perfect - no tears or spots. Keep in mind the size of the
jar you are going to use when you make your candleholder. If it's a
pint-sized Mason jar, try to get fairly small leaves. Try to get a
pleasing collection: either leaves that are all alike, or combine
different shapes and colors for a more diverse assortment. It's a good
idea to get mostly light-colored leaves like yellow and light orange ones
so that, eventually, the candle light can shine through easily; just have
a few dark, dark red ones and brown ones for accent.
- Place your leaves so that they lay flat on one or more pieces of newspaper
or waxed paper in the middle of a big, thick book. Carefully close the
book, and pile several more on top to weight those leaves down so that
they will lay flat. Your pile of books should be on a hard surface, such
as a desk or table, or on a hard-surface floor.
- Now wait one week and check to make sure your leaves are drying
nicely. If they are, replace the books and let them dry for another week
or two.
- Session 2: now let's make the
candle holders! You can actually use any kind of glass container, so if
you want all different sizes, go ahead! A tiny round mustard jar . . . a
big pickle jar . . . an antique . . . just about any glass container will
do. But we'll refer to a Mason jar just because they are inexpensive and
always available. Take the lid off the Mason jar. Put it on newspaper or
plastic to catch any drips.
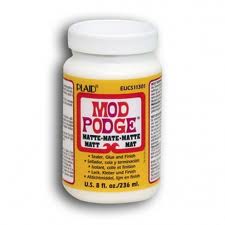
- Take the brush and smear Mod
Podge all over the outside of the jar. Mod Podge is a decoupage medium; it
dries sort of like glue and is a way to stick things that aren't perfectly
flat onto other things that might be really curved, such as our jar. NOTE:
do not apply any Mod Podge on the grooved area at the top, where you screw
on the lid, nor on the bottom - just the sides, up to the grooves.
- Now start placing your dry
leaves right onto the Mod Podge'd surface of the side of the jar. Press a
leaf in so that it sticks to the Mod Podge. Then, with more Mod Podge on
your brush, brush over the top of the leaf so that it lays flat. You probably
can't use too much Mod Podge, so be generous.
- Arrange your leaves in a pretty
pattern as you go. It's OK to leave bare space with no leaves there. It's
fun to overlap a few, but note that once you get two or three on top of
each other, it will block the candlelight because it will be too dark. So
watch out!
9.
Once
you are pleased with your assortment and have placed leaves all around the jar
surface, dip your brush into Mod Podge and turn it sideways - flat - and
"stipple," or rough up, a pattern with the flat side of the brush, in the Mod
Podge areas that are NOT covered with leaves. The stippled Mod Podge will
create a pleasing pattern when the light shines through the open areas of your
jar. If you don't stipple, then your brush strokes will show, and they won't
look as pretty as the stippled look.
- Let the jar dry thoroughly according to package directions,
at least an hour. Then apply a second coat of Mod Podge, again stippling
the open areas.
- Let the jar dry several hours or overnight. Spray with matte
(flat, not shiny) clear acrylic sealer. Let dry 24 hours before using.
- Drop a flat-bottomed votive candle inside the jar, or use a
battery-operated tealight.
- You can also use the jar as a container for a teachers gift,
or put candy and other treats in it for autumn gift-giving and fun.


